

So, that time has come to remove some stickers from your laptop, but you want to do it without damaging them or the laptop itself. We’re going to guide you through the entire process in today’s article so that you can easily achieve this.
The good news is that the newer the laptop and stickers, the easier it is to remove them. Generally, both laptop stickers and laptop skins should be easy to remove without damaging them, but also without leaving any residue on your laptop.
But anything can happen and fortunately residue is easy to clean as well. So if you want to keep the sticker intact for whatever reason, pay close attention to them
Removing Laptop stickers without damaging them or the laptop
No matter if we’re talking about stickers that you applied yourself or the stickers that laptops come with by default to brag with their features, you can easily remove them without any extra damage.
There are various methods to try and sometimes it might be easier that you thought it would.
1. Carefully peel them away
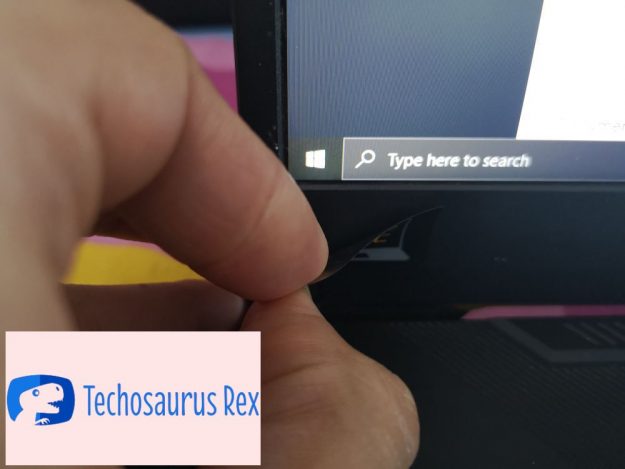

Yup, that is all that you need to do in most cases. If your laptop is new and/or if your sticker is also new (manufactured date, not recently applied!) then you will be able, in most cases, to easily remove them by simply peeling them away.
Use your fingernail on one corner to get under the edge and to peel it off a little, then slowly drag it to one side until it is completely removed.
This will see your sticker removed from the laptop without any damage to the sticker itself, but without any damage made to the laptop and with no glue residue left on it.
The key here is to do it slowly and with patience: if you try to peel it off too quickly and use fast movements, you can tear the sticker or separate the glue from it, leaving residue behind.
2. Use a hair dryer
Sometimes, older stickers or even newer ones will refuse to peel off. If you’re dealing with one, using a hair dryer is an effective way to remove them.
Make sure to shut down your laptop first, then use the hair dryer on its lowest setting to blow warm air on your sticker for around 20 seconds from a distance of around 5 centimeters from the sticker.
This will melt the glue a little bit, making it a lot easier to remove. And even though you get it warmed up a little bit, you will still be able to remove the sticker without damage to your laptop and without any residue left.
Important: Make sure that your hair dryer doesn’t blow in air that is extremely hot as that might damage your laptop, especially if you use it for longer periods of time than our recommendation.
3. Use a damp cloth
Again, make sure that your laptop is shut down and as an extra precaution, also make sure that the charging plug is disconnected.
Next, get a regular cloth and put a bit of water on it. Make sure to squeeze it well afterwards to drain any excess water: you want the cloth to be a bit damp, not dripping wet!
Finally, take the cloth and gently rub it over the entire surface of the laptop for around 30 seconds to 1 minute (depending on how stuck the sticker is). Don’t press too hard – you don’t want to damage your laptop! – and make sure to cover all areas, otherwise some might remain stuck.
After 30 seconds, use your fingernail to get under one corner of the sticker and slowly remove it.
How to remove glue residue on a laptop after removing a sticker?
In some cases, no matter how careful you are when removing the stickers, these will still tear or at least leave some glue residue behind. That should be cleaned, because it doesn’t look nice at all.
Here is what to do to remove the residue on the laptop:
1. Again, the easiest method might be all you need to do: simply rub your finger over the residue. In most cases, it will form a small ball of old glue that will be easy to remove.
2. If this method doesn’t work, try with a damp cloth. Make sure your laptop is shut down and power cord removed.
Then, use the moist cloth to rub over the residue. As it gets dirty, switch to a clean part. When there is no residue left, use the dry cloth to remove any excess liquid.
3. Use duct tape to remove the residue. Simply apply the tape over the residue, then quickly remove it. Do this multiple times until you clean the entire surface.
4. If the residue still holds tight after trying all the methods above, you can try with a tougher substance. Using white vinegar on a cloth and rubbing it over the residue will remove it.
However, use this only as a last resort and try to do it as quickly as possible, as the vinegar itself could also remove the paint on your laptop.
Once you’re done, clean the area with a damp cloth, and finish it up with a dry one.
IMPORTANT: No matter if you’re trying to remove a sticker or a laptop skin, or you’re cleaning the residue left behind, never use a sharp item like a knife or razor or anything similar.
Using them will most likely result in your laptop’s surface getting scratched so you’ll end up doing more damage than good. So never use sharp objects to remove laptop stickers or residue, even though it might seem like an easy approach!
Conclusion
Even though we shared multiple methods and alternatives above, the truth is that in most cases, it’s extremely easy to remove these stickers and you will only need to use your fingernail.
But in case it does get a bit more complicated, you know what to do to remove stickers from a laptop without damaging them, but also what to do in case residue is left behind.